Local SEO Strategy: 7 Steps to Dominate Local Search in 2026
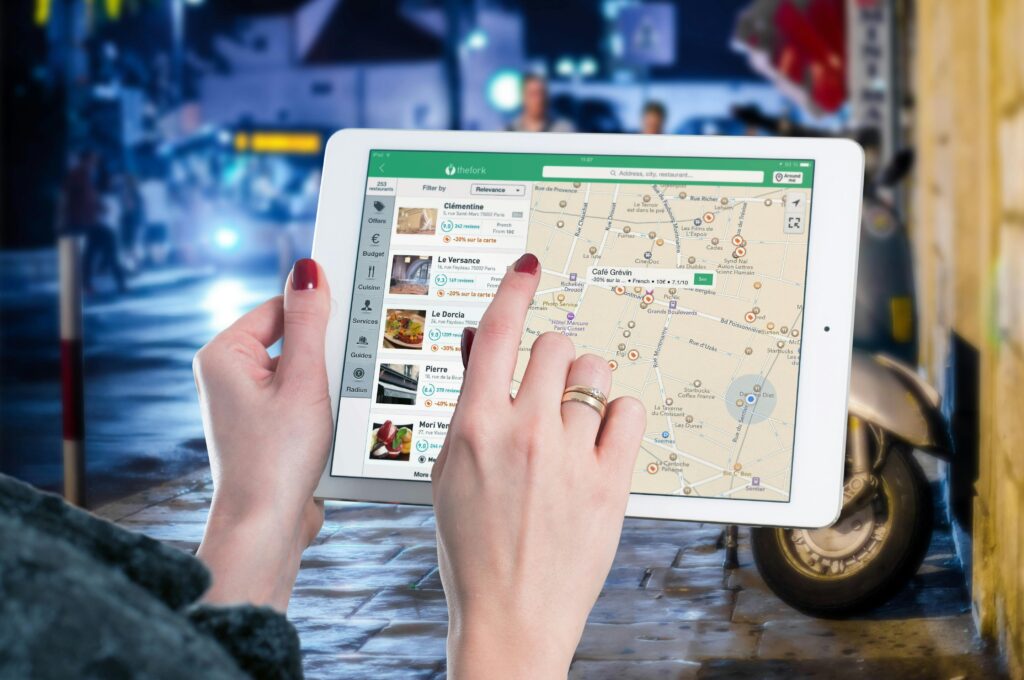
Local SEO Strategy:7 Steps to Dominate Local Search in 2026 When someone in your area searches “plumber near me,” “best Italian restaurant,” or “dentist open now,” does your business appear? If not, you’re invisible to the most valuable customers—people actively looking for exactly what you offer, right when they need it. The numbers tell a compelling story: 76% of people who search for something nearby visit a business within 24 hours 28% of local searches result in a purchase “Near me” searches have grown over 500% in recent years 46% of all Google searches have local intent Local SEO isn’t optional anymore—it’s essential. And in 2026, it’s become more sophisticated than ever. AI-powered search, increased mobile usage, voice search, and evolving algorithms have transformed how local businesses get found online. This comprehensive guide walks you through building a complete local SEO strategy that actually works. You’ll learn exactly what to optimize, where to focus your efforts, and how to measure results. Whether you’re a restaurant, law firm, contractor, retailer, or any business serving local customers, these seven steps will help you dominate local search results. Step 1: Claim and Optimize Your Google Business Profile Your Google Business Profile (GBP) is the single most important element of local SEO. It’s the primary touchpoint between your business and potential customers searching for local services. When people search for businesses like yours, your GBP determines whether you appear in: Google Maps results The “Local Pack” (the top 3 local results with map) Google’s Knowledge Panel AI Overviews and search summaries Claim Your Profile If you haven’t claimed your profile yet, do it immediately: Go to google.com/business Search for your business name If it exists, claim it; if not, create a new profile Verify your business (usually by phone or postcard) Complete Every Section Google rewards complete, detailed profiles. Fill out 100% of your profile: Business Name: Use your real business name (don’t stuff keywords here—Google penalizes this) Categories: Choose your primary category carefully (it’s the most important), then add relevant secondary categories (up to 10) Address: Use your actual physical address exactly as it appears everywhere else online Service Area: If you serve customers at their location, define your service radius or specific areas Phone Number: Use a local number, not a call tracking number here Website: Link to your website (obviously!) Hours: Keep these updated, including special hours for holidays Business Description: Write 750 characters describing what you do, who you serve, and what makes you different (include relevant keywords naturally) Add High-Quality Photos and Videos Visual content dramatically improves engagement: Exterior photos of your business Interior photos showing your space Team photos (people connect with people) Product/service photos Action shots (you doing your work) Before/after photos if applicable Businesses with photos receive 42% more requests for directions and 35% more clicks to their websites. Use Google Posts Post updates regularly (weekly is ideal): Promotions and special offers New products or services Events Company news Holiday hours Posts appear in your GBP and signal to Google that your business is active. Enable Messaging Let customers message you directly through your GBP. Quick responses improve your profile’s visibility. Add Products and Services List everything you offer with descriptions and pricing when appropriate. This helps Google understand what searches should trigger your business. Step 2: Generate and Manage Customer Reviews Reviews are one of the strongest ranking factors in local SEO. They signal trust, relevance, and quality to both Google and potential customers. Why Reviews Matter Improve rankings: More reviews (especially recent ones) boost visibility in the Local Pack and Maps Increase conversions: 88% of consumers trust online reviews as much as personal recommendations Provide context: Review content helps Google understand what you actually do Signal activity: Regular reviews show your business is active and serving customers Build a Review Generation System Don’t just randomly ask for reviews. Create a systematic approach: Identify the right moment: Ask when customers are most satisfied: Right after completing excellent service When a customer gives positive feedback After solving a problem successfully Make it easy: Reduce friction: Send direct links to your GBP review page Use review management tools that automate requests Provide clear, simple instructions Ask the right way: Be personal and genuine Explain why reviews matter to your business Never offer incentives (violates Google’s policies) Example request: “We’re so glad you were happy with [specific service]. If you have a moment, would you mind leaving us a review on Google? It really helps other people in [city] find us. Here’s a direct link: [URL]” Respond to All Reviews Responding shows you care and provides additional context: Positive reviews: Thank them by name Reference specifics from their review Invite them back Negative reviews: Respond quickly (within 24-48 hours) Acknowledge their concern Apologize if appropriate Offer to resolve the issue offline Keep it professional and brief Never argue publicly or make excuses. Your response is for future customers reading the review, not just the reviewer. Monitor Your Reputation Set up Google Alerts for your business name and regularly check: Google Business Profile reviews Facebook reviews Industry-specific review sites (Yelp, TripAdvisor, Healthgrades, Avvo, etc.) Better Business Bureau Step 3: Build Consistent Local Citations Citations are online mentions of your business name, address, and phone number (NAP). They help Google verify your business and improve local rankings. If you believe you meet the eligibility criteria, here’s the exact process: What Are Citations? Citations appear in: Online directories (Yellow Pages, Yelp) Chamber of Commerce websites Industry-specific directories Local news sites Business listing sites Social media profiles While logged into Facebook with admin permissions for the Page you want to verify (or logged into the profile you want verified), navigate to Facebook’s verification request form. Note that this link only works if you’re properly logged in with admin access. The Consistency Rule Your NAP information must be identical everywhere it appears. Inconsistent information confuses Google and can hurt rankings. Consistent: Emile Meyer Web Design 123 Main Street, Suite 5 Denver, CO
10 Obsolete SEO Tactics That Will Hurt Your Rankings in 2026

How to Get Your Facebook Page or Account Verified in 2026 That blue checkmark on Facebook isn’t just about status—it’s about credibility, visibility, and trust. In an era where fake accounts and impersonation are rampant, Facebook verification has become essential for businesses, creators, and public figures who want to establish authentic online presences. But getting verified on Facebook isn’t automatic, and it’s not always easy. The process has evolved significantly, especially with the introduction of Meta Verified, Facebook’s paid subscription service. Now there are two distinct paths to verification: the traditional free route (which is highly selective) and the paid Meta Verified program (which is more accessible but still requires meeting specific criteria). Whether you’re a small business owner trying to build credibility, a content creator protecting your brand, or an organization looking to stand out in search results, this comprehensive guide will walk you through everything you need to know about Facebook verification in 2026. What Is Facebook Verification? Facebook verification is the process by which Meta confirms that an account or Page authentically represents the person, brand, or organization it claims to represent. Verified accounts and Pages display a blue checkmark badge next to their name, signaling to users that Facebook has validated their authenticity. The blue verification badge serves several purposes: Trust Signal: It tells users they’re interacting with the real account, not an imposter or fan page. Search Priority: Verified Pages and accounts appear higher in Facebook search results, making them easier to find. Brand Protection: It makes impersonation more difficult and helps prevent confusion among your audience. Feature Access: Verified accounts may gain access to additional features, analytics, and advertising options. Professional Credibility: For businesses and public figures, the badge adds legitimacy and professionalism. Two Paths to Verification in 2026 As of 2026, there are two distinct ways to get verified on Facebook: Traditional (Free) Verification This is the original verification program Facebook launched in 2013. It’s completely free but highly selective. Facebook evaluates accounts based on authenticity, uniqueness, completeness, and notability. This path is increasingly difficult to navigate as Facebook prioritizes its paid program. Who It’s For: Well-known public figures, major brands, entities frequently searched for on Facebook, and accounts with significant media coverage. Meta Verified (Paid Subscription) Launched in 2023, Meta Verified is a subscription service that provides verification badges along with additional benefits. Pricing varies by plan: Standard Plan: $14.99/month Plus Plan: $49.99/month Premium Plan: $149.99/month Max Plan: $499.99/month (for large businesses with employee protection) Who It’s For: Anyone willing to pay and meet basic authentication requirements, including small businesses, emerging creators, and professionals building their online presence. Important: Even paid subscribers must meet eligibility requirements and provide government-issued ID. Payment doesn’t guarantee approval—it just makes the process more accessible. Requirements for Traditional (Free) Verification If you’re pursuing the free verification route, Facebook has strict eligibility criteria: Authenticity Your account or Page must represent a real person, registered business, or legitimate entity. You’ll need to provide documentation proving your identity or business registration. Uniqueness You must be the only Facebook presence for that person or business. Exceptions exist for language-specific accounts (like “@YourBrand” and “@YourBrandFrancais”), but generally, one person or entity gets one verified account. Completeness Your profile or Page must be fully filled out, including: Profile photo Cover photo (for Pages) About section with complete information At least one recent post Active engagement history Notability This is the most challenging requirement. Facebook wants to verify accounts that people actually search for and care about. You need to demonstrate public interest through: Significant media coverage (news articles, interviews, features) Large following (no official minimum, but typically 10K+ helps significantly) High search volume for your name or brand Recognition in your industry or field Documentation for Notability: Links to news articles mentioning you/your brand (up to 5) Press releases or media coverage Evidence of search demand for your name Industry awards or recognition Verified presence on other platforms Policy Compliance You must follow Facebook’s Terms of Service and Community Standards. Any violations disqualify you from verification and can result in losing an existing badge. Step-by-Step: Applying for Traditional Verification If you believe you meet the eligibility criteria, here’s the exact process: Step 1: Access the Verification Request Form While logged into Facebook with admin permissions for the Page you want to verify (or logged into the profile you want verified), navigate to Facebook’s verification request form. Note that this link only works if you’re properly logged in with admin access. Step 2: Choose Your Verification Type Select whether you’re verifying a Page or personal profile. The requirements are similar, but profile verification tends to be more stringent as it’s typically reserved for public figures. If verifying a Page, select which Page from the dropdown menu of Pages you manage. Step 3: Upload Authentication Documents For personal profiles: Government-issued photo ID (driver’s license, passport, national ID) Must show your legal name and photo For business Pages: Business license or registration Tax registration documents Articles of incorporation Official business documentation confirming legal entity Important: Self-filed tax documents are typically not accepted. You need official government-issued business documentation. Step 4: Select Your Category Choose the category that best describes your Page or profile: News/Media Sports Music Entertainment Government/Politics Brand/Product Artist/Public Figure Local Business Choose carefully—your category affects how Facebook evaluates your notability. Step 5: Provide Country and Audience Information Enter your primary country or region, describe your audience or followers, and include any alternate names or acronyms (AKAs) your brand or persona is known by. Step 6: Demonstrate Notability This is the most critical step. Provide links to up to five sources that demonstrate public interest in your account: News articles mentioning you or your brand Media interviews or features Industry publications Verified Wikipedia page High-authority website mentions Choose your strongest evidence. Quality matters more than quantity—one feature in a major publication beats five small blog mentions. Step 7: Submit and Wait After completing all sections, click “Send” to submit your application. Processing Time: Facebook’s
8 E-Commerce SEO Tips to Boost Organic Traffic in 2026

How to Get Your Facebook Page or Account Verified in 2026 That blue checkmark on Facebook isn’t just about status—it’s about credibility, visibility, and trust. In an era where fake accounts and impersonation are rampant, Facebook verification has become essential for businesses, creators, and public figures who want to establish authentic online presences. But getting verified on Facebook isn’t automatic, and it’s not always easy. The process has evolved significantly, especially with the introduction of Meta Verified, Facebook’s paid subscription service. Now there are two distinct paths to verification: the traditional free route (which is highly selective) and the paid Meta Verified program (which is more accessible but still requires meeting specific criteria). Whether you’re a small business owner trying to build credibility, a content creator protecting your brand, or an organization looking to stand out in search results, this comprehensive guide will walk you through everything you need to know about Facebook verification in 2026. What Is Facebook Verification? Facebook verification is the process by which Meta confirms that an account or Page authentically represents the person, brand, or organization it claims to represent. Verified accounts and Pages display a blue checkmark badge next to their name, signaling to users that Facebook has validated their authenticity. The blue verification badge serves several purposes: Trust Signal: It tells users they’re interacting with the real account, not an imposter or fan page. Search Priority: Verified Pages and accounts appear higher in Facebook search results, making them easier to find. Brand Protection: It makes impersonation more difficult and helps prevent confusion among your audience. Feature Access: Verified accounts may gain access to additional features, analytics, and advertising options. Professional Credibility: For businesses and public figures, the badge adds legitimacy and professionalism. Two Paths to Verification in 2026 As of 2026, there are two distinct ways to get verified on Facebook: Traditional (Free) Verification This is the original verification program Facebook launched in 2013. It’s completely free but highly selective. Facebook evaluates accounts based on authenticity, uniqueness, completeness, and notability. This path is increasingly difficult to navigate as Facebook prioritizes its paid program. Who It’s For: Well-known public figures, major brands, entities frequently searched for on Facebook, and accounts with significant media coverage. Meta Verified (Paid Subscription) Launched in 2023, Meta Verified is a subscription service that provides verification badges along with additional benefits. Pricing varies by plan: Standard Plan: $14.99/month Plus Plan: $49.99/month Premium Plan: $149.99/month Max Plan: $499.99/month (for large businesses with employee protection) Who It’s For: Anyone willing to pay and meet basic authentication requirements, including small businesses, emerging creators, and professionals building their online presence. Important: Even paid subscribers must meet eligibility requirements and provide government-issued ID. Payment doesn’t guarantee approval—it just makes the process more accessible. Requirements for Traditional (Free) Verification If you’re pursuing the free verification route, Facebook has strict eligibility criteria: Authenticity Your account or Page must represent a real person, registered business, or legitimate entity. You’ll need to provide documentation proving your identity or business registration. Uniqueness You must be the only Facebook presence for that person or business. Exceptions exist for language-specific accounts (like “@YourBrand” and “@YourBrandFrancais”), but generally, one person or entity gets one verified account. Completeness Your profile or Page must be fully filled out, including: Profile photo Cover photo (for Pages) About section with complete information At least one recent post Active engagement history Notability This is the most challenging requirement. Facebook wants to verify accounts that people actually search for and care about. You need to demonstrate public interest through: Significant media coverage (news articles, interviews, features) Large following (no official minimum, but typically 10K+ helps significantly) High search volume for your name or brand Recognition in your industry or field Documentation for Notability: Links to news articles mentioning you/your brand (up to 5) Press releases or media coverage Evidence of search demand for your name Industry awards or recognition Verified presence on other platforms Policy Compliance You must follow Facebook’s Terms of Service and Community Standards. Any violations disqualify you from verification and can result in losing an existing badge. Step-by-Step: Applying for Traditional Verification If you believe you meet the eligibility criteria, here’s the exact process: Step 1: Access the Verification Request Form While logged into Facebook with admin permissions for the Page you want to verify (or logged into the profile you want verified), navigate to Facebook’s verification request form. Note that this link only works if you’re properly logged in with admin access. Step 2: Choose Your Verification Type Select whether you’re verifying a Page or personal profile. The requirements are similar, but profile verification tends to be more stringent as it’s typically reserved for public figures. If verifying a Page, select which Page from the dropdown menu of Pages you manage. Step 3: Upload Authentication Documents For personal profiles: Government-issued photo ID (driver’s license, passport, national ID) Must show your legal name and photo For business Pages: Business license or registration Tax registration documents Articles of incorporation Official business documentation confirming legal entity Important: Self-filed tax documents are typically not accepted. You need official government-issued business documentation. Step 4: Select Your Category Choose the category that best describes your Page or profile: News/Media Sports Music Entertainment Government/Politics Brand/Product Artist/Public Figure Local Business Choose carefully—your category affects how Facebook evaluates your notability. Step 5: Provide Country and Audience Information Enter your primary country or region, describe your audience or followers, and include any alternate names or acronyms (AKAs) your brand or persona is known by. Step 6: Demonstrate Notability This is the most critical step. Provide links to up to five sources that demonstrate public interest in your account: News articles mentioning you or your brand Media interviews or features Industry publications Verified Wikipedia page High-authority website mentions Choose your strongest evidence. Quality matters more than quantity—one feature in a major publication beats five small blog mentions. Step 7: Submit and Wait After completing all sections, click “Send” to submit your application. Processing Time: Facebook’s
Website Organization Best Practices for Law Firms (2026)

How to Get Your Facebook Page or Account Verified in 2026 That blue checkmark on Facebook isn’t just about status—it’s about credibility, visibility, and trust. In an era where fake accounts and impersonation are rampant, Facebook verification has become essential for businesses, creators, and public figures who want to establish authentic online presences. But getting verified on Facebook isn’t automatic, and it’s not always easy. The process has evolved significantly, especially with the introduction of Meta Verified, Facebook’s paid subscription service. Now there are two distinct paths to verification: the traditional free route (which is highly selective) and the paid Meta Verified program (which is more accessible but still requires meeting specific criteria). Whether you’re a small business owner trying to build credibility, a content creator protecting your brand, or an organization looking to stand out in search results, this comprehensive guide will walk you through everything you need to know about Facebook verification in 2026. What Is Facebook Verification? Facebook verification is the process by which Meta confirms that an account or Page authentically represents the person, brand, or organization it claims to represent. Verified accounts and Pages display a blue checkmark badge next to their name, signaling to users that Facebook has validated their authenticity. The blue verification badge serves several purposes: Trust Signal: It tells users they’re interacting with the real account, not an imposter or fan page. Search Priority: Verified Pages and accounts appear higher in Facebook search results, making them easier to find. Brand Protection: It makes impersonation more difficult and helps prevent confusion among your audience. Feature Access: Verified accounts may gain access to additional features, analytics, and advertising options. Professional Credibility: For businesses and public figures, the badge adds legitimacy and professionalism. Two Paths to Verification in 2026 As of 2026, there are two distinct ways to get verified on Facebook: Traditional (Free) Verification This is the original verification program Facebook launched in 2013. It’s completely free but highly selective. Facebook evaluates accounts based on authenticity, uniqueness, completeness, and notability. This path is increasingly difficult to navigate as Facebook prioritizes its paid program. Who It’s For: Well-known public figures, major brands, entities frequently searched for on Facebook, and accounts with significant media coverage. Meta Verified (Paid Subscription) Launched in 2023, Meta Verified is a subscription service that provides verification badges along with additional benefits. Pricing varies by plan: Standard Plan: $14.99/month Plus Plan: $49.99/month Premium Plan: $149.99/month Max Plan: $499.99/month (for large businesses with employee protection) Who It’s For: Anyone willing to pay and meet basic authentication requirements, including small businesses, emerging creators, and professionals building their online presence. Important: Even paid subscribers must meet eligibility requirements and provide government-issued ID. Payment doesn’t guarantee approval—it just makes the process more accessible. Requirements for Traditional (Free) Verification If you’re pursuing the free verification route, Facebook has strict eligibility criteria: Authenticity Your account or Page must represent a real person, registered business, or legitimate entity. You’ll need to provide documentation proving your identity or business registration. Uniqueness You must be the only Facebook presence for that person or business. Exceptions exist for language-specific accounts (like “@YourBrand” and “@YourBrandFrancais”), but generally, one person or entity gets one verified account. Completeness Your profile or Page must be fully filled out, including: Profile photo Cover photo (for Pages) About section with complete information At least one recent post Active engagement history Notability This is the most challenging requirement. Facebook wants to verify accounts that people actually search for and care about. You need to demonstrate public interest through: Significant media coverage (news articles, interviews, features) Large following (no official minimum, but typically 10K+ helps significantly) High search volume for your name or brand Recognition in your industry or field Documentation for Notability: Links to news articles mentioning you/your brand (up to 5) Press releases or media coverage Evidence of search demand for your name Industry awards or recognition Verified presence on other platforms Policy Compliance You must follow Facebook’s Terms of Service and Community Standards. Any violations disqualify you from verification and can result in losing an existing badge. Step-by-Step: Applying for Traditional Verification If you believe you meet the eligibility criteria, here’s the exact process: Step 1: Access the Verification Request Form While logged into Facebook with admin permissions for the Page you want to verify (or logged into the profile you want verified), navigate to Facebook’s verification request form. Note that this link only works if you’re properly logged in with admin access. Step 2: Choose Your Verification Type Select whether you’re verifying a Page or personal profile. The requirements are similar, but profile verification tends to be more stringent as it’s typically reserved for public figures. If verifying a Page, select which Page from the dropdown menu of Pages you manage. Step 3: Upload Authentication Documents For personal profiles: Government-issued photo ID (driver’s license, passport, national ID) Must show your legal name and photo For business Pages: Business license or registration Tax registration documents Articles of incorporation Official business documentation confirming legal entity Important: Self-filed tax documents are typically not accepted. You need official government-issued business documentation. Step 4: Select Your Category Choose the category that best describes your Page or profile: News/Media Sports Music Entertainment Government/Politics Brand/Product Artist/Public Figure Local Business Choose carefully—your category affects how Facebook evaluates your notability. Step 5: Provide Country and Audience Information Enter your primary country or region, describe your audience or followers, and include any alternate names or acronyms (AKAs) your brand or persona is known by. Step 6: Demonstrate Notability This is the most critical step. Provide links to up to five sources that demonstrate public interest in your account: News articles mentioning you or your brand Media interviews or features Industry publications Verified Wikipedia page High-authority website mentions Choose your strongest evidence. Quality matters more than quantity—one feature in a major publication beats five small blog mentions. Step 7: Submit and Wait After completing all sections, click “Send” to submit your application. Processing Time: Facebook’s
Google Explains How to Remove Pages for SEO: The Complete 2026 Guide

Google Explains How to Remove Pages for SEO: The Complete 2026 Guide Every website eventually needs to remove content from Google’s search results. Maybe you’ve discontinued products, published duplicate content by mistake, exposed sensitive information, or simply have outdated pages hurting your site’s overall performance. The problem? Most people handle content removal completely wrong. Deleting a page and hoping Google figures it out. Blocking everything with robots.txt. Using the removal tool as a first resort instead of a last resort. These common mistakes don’t just fail to solve the problem—they can actually damage your SEO, waste link equity, and create poor user experiences. Google has specific, official methods for removing content from search results. Some are temporary, some are permanent, and choosing the wrong approach can cost you rankings, traffic, and credibility. This guide explains exactly how to remove pages from Google the right way, covering every method Google recommends, when to use each one, and crucially, what NOT to do. Whether you’re dealing with a single outdated page or cleaning up hundreds of URLs, this is your complete playbook. Why Proper Page Removal Matters for SEO Before diving into the how, let’s understand why removal method matters. When you remove a page improperly, several things can go wrong: Broken User Experience: Visitors clicking old links from social media, bookmarks, or external sites hit error pages instead of relevant content. Lost Link Equity: If other websites link to your removed page, simply deleting it wastes all that SEO value. Proper redirects pass that authority to relevant content. Crawl Budget Waste: Google’s crawlers spending time on error pages, outdated URLs, or redirected chains means less attention on your valuable content. Ranking Drops: Removing pages without redirects can signal to Google that your site is shrinking or poorly maintained, potentially affecting your overall domain authority. Confused Search Results: Improperly removed pages can linger in Google’s index for months, showing outdated or incorrect information to searchers. The goal isn’t just to make a page disappear—it’s to remove it in a way that preserves SEO value, maintains user experience, and follows Google’s guidelines. Understanding Google’s Official Removal Methods Google provides several distinct methods for removing content from search results. Each serves a different purpose, and choosing the right one depends on your specific situation. Method 1: 301 Redirects (The Preferred Solution) What It Is: A 301 redirect is a permanent redirect from one URL to another. When someone (or Google) tries to access the old URL, they’re automatically sent to the new URL. When to Use It: You’re replacing old content with new content You’re consolidating multiple pages into one You’re moving content to a different URL The topic is still relevant but the page needs updating Why It’s Best: 301 redirects pass approximately 90-95% of link equity from the old page to the new page. Any backlinks, bookmarks, or external references automatically work with the new URL. Users get relevant content instead of errors. Google smoothly transitions your rankings. How to Implement: The exact method depends on your platform, but here’s the general approach: For WordPress: Use a redirect plugin like Redirection or Yoast SEO Premium. Simply enter the old URL and the new destination URL. For Apache Servers: Add to your .htaccess file: Redirect 301 /old-page.html https://www.yoursite.com/new-page.html For Nginx Servers: Add to your server configuration:rewrite ^/old-page.html$ https://www.yoursite.com/new-page.html permanent; Important: Choose redirect destinations thoughtfully. Redirect to the most relevant, similar content available. If you’re removing a product page for “blue running shoes,” redirect to your “running shoes” category or a similar blue shoe, not your homepage. Method 2: 404 Not Found (When There’s No Replacement) What It Is: A 404 error code tells browsers and search engines that the page doesn’t exist and never will again. When to Use It: The content is genuinely gone with no replacement There’s no relevant page to redirect to Temporary content (like time-limited promotions) has expired Spam or low-quality pages that add no value How It Works: When Google crawls a URL and receives a 404 response, it understands the page is gone and will eventually remove it from the index. This typically takes a few days to a few weeks depending on how often Google crawls that URL. How to Implement: Usually, simply deleting the page is enough—your server will automatically return a 404. However, some platforms require configuration to ensure proper 404 responses. Best Practice: Create a helpful 404 page template that includes: Clear message that the page doesn’t exist Search functionality Links to popular pages or categories Contact information if users need help Method 3: 410 Gone (Stronger Signal Than 404) What It Is: A 410 status code tells search engines that the page is permanently gone and won’t be coming back. When to Use It: You want faster removal from Google’s index The content was intentionally removed (not just missing) You’re certain the page will never return Difference from 404: While 404 means “not found” (which could be temporary), 410 means “gone permanently.” Google removes 410 pages from its index faster than 404 pages because the signal is clearer. How to Implement: This requires server-side configuration or CMS customization, as most platforms don’t offer 410 responses by default. The exact method depends on your setup, but the concept is the same: configure your server to return a 410 status for specific URLs. Method 4: Noindex Meta Tag (Prevent Indexing) What It Is: A meta tag placed in a page’s HTML that tells search engines “don’t index this page.” When to Use It: Temporary content you want accessible to users but not search engines Staging or development pages Thank you pages or confirmation pages Duplicate content variations you want available but not ranked Internal search results pages How It Works: The page remains accessible to users, but search engines that encounter the noindex tag will remove it from their index. This requires the page to remain live and crawlable—if you block crawling, Google can’t see the noindex tag. How to Implement: Via HTML:
10 E-Commerce SEO Challenges & How to Overcome Them in 2026

10 E-Commerce SEO Challenges & How They Impact Your Online Store’s Success Running an online store in 2026 means competing in one of the most challenging digital landscapes ever created. While traditional websites worry about a few dozen competitors, e-commerce businesses face off against retail giants like Amazon and Walmart, thousands of specialized stores, and an ever-changing search algorithm that seems designed to test your patience. The stakes are high. According to recent research, 37.5% of all online purchases start with an organic search. If your products don’t appear when potential customers are looking, you’re not just losing visibility—you’re losing revenue directly to competitors who figured out the SEO puzzle. But here’s the reality that most e-commerce business owners face: SEO for online stores is fundamentally different from SEO for content sites, local businesses, or service providers. The challenges are unique, the solutions are specific, and the mistakes can be costly. This guide examines the ten most critical SEO challenges facing e-commerce businesses today and, more importantly, provides actionable strategies to overcome each one. Whether you’re running a small boutique shop or managing a large catalog, understanding these challenges is the first step toward building sustainable organic traffic and sales. Challenge #1: Algorithm Volatility and Constant Updates Arguably the biggest challenge facing e-commerce SEOs is the relentless pace of algorithm changes. Google rolls out major core updates several times per year, with smaller updates happening multiple times daily. A product page that ranked #1 yesterday might drop to page three today, with no obvious explanation. Why This Hurts E-Commerce Unlike content sites that can quickly adjust blog posts, e-commerce stores have complex, interconnected structures. A single algorithm update can affect thousands of product pages, category listings, and filtered navigation pages simultaneously. The traffic swings can be dramatic and immediate, directly impacting revenue. How to Overcome It Stay Informed Without Overreacting: Subscribe to trusted SEO news sources like Search Engine Journal, SEO Fomo, and follow experts like Glenn Gabe, Barry Schwartz, and Lily Ray on LinkedIn. When updates hit, you’ll get analysis before your traffic tanks. Focus on Fundamentals: Algorithm updates typically reward sites that already follow best practices. Instead of chasing each update, build a strong foundation: fast page speeds, clear site structure, quality product descriptions, and genuine customer reviews. Diversify Traffic Sources: Don’t rely solely on Google. Build your email list, invest in social media, consider marketplace presence, and create other owned channels. When algorithm volatility strikes, you’ll have backup revenue streams. Document Baselines: Track your normal performance metrics so you can identify real problems versus normal fluctuations. Not every ranking drop is an algorithmic penalty—sometimes it’s just competition or seasonal changes. Challenge #2: Securing Long-Term Stakeholder Buy-In SEO is a long-term investment with high upfront costs and slow results. For e-commerce businesses where leadership expects quick returns, getting and maintaining support for SEO initiatives can be incredibly difficult. Why This Hurts E-Commerce While paid advertising shows immediate ROI and social media provides instant engagement metrics, SEO results aren’t tangible for six to twelve months. When stakeholders get impatient, SEO work gets deprioritized—which is exactly when initiatives fail. The average ROI for SEO is significant—about 33% of website traffic comes from organic search for most industries. But proving the value today when results arrive tomorrow is challenging. How to Overcome It Use SEO Forecasting: Project search-driven revenue using tools and models. Show stakeholders what traffic increases could mean in actual sales numbers, not just rankings or visits. Deliver Quick Wins: Demonstrate capability with low-hanging fruit. Target less competitive but relevant keywords where you can rank quickly. Fix obvious technical issues that show immediate improvements. These small victories build credibility for larger initiatives. Track the Right Metrics: Stop reporting on rankings alone. Focus on metrics that matter to business leaders: organic revenue, conversion rates from organic traffic, customer acquisition cost compared to paid channels, and lifetime value of organic customers versus paid. Create Comparison Data: Show what competitors are doing with SEO and what market share you’re losing by underinvesting. Sometimes fear of missing out is more motivating than potential gains. Challenge #3: Optimizing for AI and Zero-Click Searches In 2026, shoppers increasingly discover and research products without ever clicking an organic listing. AI-powered search features like Google’s AI Overviews and direct purchases through ChatGPT are fundamentally changing the game. Why This Hurts E-Commerce Traditional SEO success was measured in clicks and visits. But AI systems now answer product questions, compare options, and even facilitate purchases without sending users to your website. You can be “visible” in an AI summary without getting any traffic or revenue. How to Overcome It Optimize for AI Visibility: Structure your product pages with clear, scannable content. Use bullet points for specifications, include FAQ sections, and write concise definitions. AI systems pull from content that’s easy to parse. Implement Proper Structured Data: Product schema markup with complete information—name, images, description, brand, SKU, pricing, availability—helps AI systems understand and cite your products. This is non-negotiable in 2026. Target Long-Tail Conversational Queries: When people use AI tools, they typically use full sentences: “What’s the best waterproof hiking boot under $200?” Optimize for these natural language queries, not just short keywords. Build Brand Authority: Since AI systems prioritize trustworthy sources, focus on becoming a recognizable brand in your niche. Get mentioned in reputable publications, earn quality backlinks, and accumulate genuine positive reviews. Focus on Bottom-Funnel Content: While AI handles research, humans still make final purchase decisions. Optimize pricing pages, comparison tools, and conversion-focused content that performs when buyers are ready to act. Challenge #4: Managing Massive Product Catalogs Unlike content sites with dozens of pages, e-commerce stores often have hundreds or thousands of product pages. Each one needs optimization, but managing this scale is overwhelming. Why This Hurts E-Commerce Thin product descriptions, duplicate content across similar products, inconsistent formatting, and outdated inventory create massive SEO problems. Manually optimizing thousands of pages isn’t realistic, but leaving them broken tanks your entire site’s performance. How to Overcome It Create
15 SEO Myths Debunked: What Actually Works in 2026

15 SEO Myths Debunked:What Really Works in 2026 If you’ve spent any time trying to improve your website’s search rankings, you’ve probably encountered conflicting advice. One expert says keywords are dead. Another swears by them. Someone promises page-one rankings in 30 days, while another tells you SEO takes years to work. The truth? The SEO industry is riddled with myths, outdated practices, and flat-out misinformation. Some of these myths are simply old strategies that no longer work. Others are misunderstandings about how search engines actually operate. And some are deliberately spread by agencies trying to sell you unnecessary services. In this guide, we’re cutting through the noise to debunk the most common SEO myths so you can focus your efforts on strategies that actually drive results in 2026. Why SEO Myths Persist Before we dive into specific myths, it’s worth understanding why they continue to spread despite being repeatedly debunked by Google itself. First, SEO is complex and constantly evolving. What worked five years ago might hurt your rankings today. When Google rolls out algorithm updates, the rules change, but outdated advice lingers on blogs and forums. Second, there’s a cognitive bias called “anchoring bias” where we place disproportionate importance on the first piece of information we encounter. If you learn an SEO myth early in your journey, it’s surprisingly difficult to unlearn it even when presented with accurate information later. Third, many SEO tools and agencies have a vested interest in maintaining certain myths because they can sell solutions to problems that don’t actually exist. Finally, AI-generated content has amplified the problem. AI tools are trained on public content, including outdated best practices and widely repeated myths, which means they often reinforce misinformation by surfacing popular but inaccurate claims. Now let’s tackle the specific myths holding your website back. Myth #1: SEO Is Dead This is perhaps the oldest and most persistent myth in digital marketing. Every few years, someone declares that SEO is dead, usually in response to a major shift in the search landscape. Reality: SEO is very much alive. Google processes 8.5 billion searches every single day, more than any other platform on the web. Organic search remains the top source of website traffic for most businesses, outranking all other channels combined for long-term, consistent traffic. Yes, the landscape has changed with AI overviews and zero-click searches, but search is still the primary way people find businesses, products, and information online. If anything, good SEO is more important than ever as competition intensifies. Myth #2: Keyword Research Doesn’t Matter Anymore Some experts claim that with Google’s advanced natural language processing, keyword research is obsolete. They argue that you should just “write naturally” and Google will figure out what your content is about. Reality: Keyword research remains the backbone of any successful SEO strategy. While Google has become much better at understanding context and synonyms, keywords are still how we map user intent and understand what people are actually searching for. The difference in 2026 is the shift from short-tail keywords to long-tail, conversational queries. Your keyword research should now focus on identifying the specific questions your audience asks, especially to AI assistants and voice search devices. Tools like SEMrush, Ahrefs, and Google Keyword Planner remain essential for discovering what your target audience is searching for and creating content that answers their queries. Myth #3: More Content Is Always Better You’ve probably heard that publishing frequently is the key to SEO success. Some agencies recommend publishing multiple articles per day to “dominate” your niche. Reality: Quality trumps quantity every single time. One comprehensive, well-researched article that thoroughly addresses user intent will outperform ten thin, hastily written posts. Google’s algorithms have become increasingly sophisticated at evaluating content quality, expertise, and trustworthiness. The focus should be on creating content that demonstrates genuine expertise and provides unique value, not churning out mediocre articles to hit a publishing quota. That said, consistency matters. A steady publishing schedule of high-quality content beats sporadic bursts of activity. Myth #4: Word Count Is a Ranking Factor Related to the previous myth, many SEOs believe there’s a magic word count that guarantees rankings. You’ll often hear that articles need to be at least 2,000 words, or that longer always means better. Reality: Google doesn’t have a word count requirement. What matters is comprehensiveness and how well you address the topic at hand. Some topics can be thoroughly covered in 800 words. Others might require 3,000 words to do justice to the subject. Recent research shows that the average word count for top-ten ranking pages is around 1,400-1,500 words, but this is a correlation, not a causation. Write as much as you need to comprehensively answer the question or address the topic. No more, no less. Myth #5: Keyword Stuffing Still Works This is a holdover from the early days of SEO when cramming keywords into your content actually helped rankings. Some people still believe that repeating your target keyword as many times as possible will boost your visibility. Reality: Keyword stuffing is not only ineffective, it’s actively harmful. Google’s algorithms now penalize websites that engage in this practice. Modern SEO prioritizes user intent over robotic keyword repetition. Instead, use semantic keywords and natural language. Tools like Clearscope and SurferSEO can help you optimize for topic relevance rather than exact-match keyword density. Your content should read naturally while still incorporating relevant terms your audience actually uses. Myth #6: Meta Tags Don’t Matter There’s a myth that meta descriptions and meta titles are obsolete and don’t impact SEO. Some claim Google ignores them entirely. Reality: While meta keywords are indeed dead and useless, meta titles and descriptions absolutely still matter. They may not be direct ranking factors, but they significantly impact click-through rates from search results. A compelling meta title and description can be the difference between someone clicking your result or your competitor’s. Higher click-through rates send positive signals to Google about your content’s relevance and value. Write meta titles under 60 characters and descriptions
Google Business Profile 101: How Small Businesses Can Dominate Local Search in 2026

Google Business Profile 101: How Small Businesses Can Dominate Local Search in 2026 If you’re a small business owner, here’s a reality check: more than 90% of people search online before choosing a local business. That search often leads them straight to your Google Business Profile (formerly known as Google My Business). In 2026, this free tool has become more powerful than ever, and if you’re not optimizing it properly, you’re essentially handing customers to your competitors. The good news? Most businesses still treat their Google Business Profile like a set-it-and-forget-it phone book listing. That means a properly optimized profile gives you a massive competitive advantage. This guide will walk you through everything you need to know to make your profile work harder for your business. What Is Google Business Profile and Why Does It Matter? Google Business Profile is your business’s digital storefront on Google Search and Google Maps. When someone searches for “coffee shop near me” or “plumber in [your city],” your profile determines whether you show up in those critical search results. Here’s what makes it essential in 2026: Google’s AI systems now use your Business Profile as a primary source of truth about your company. When AI Overviews generate answers or Gemini responds to voice searches, they’re pulling directly from profiles like yours. If your information is incomplete, outdated, or inconsistent, you’re invisible to these systems. The statistics speak for themselves. According to recent data, 76% of smartphone users who search for nearby businesses visit a physical location within a day. Nearly half of all Google searches have local intent. Your profile isn’t just nice to have anymore; it’s your first impression, your credibility signal, and often your only shot at winning a customer. Setting Up Your Profile the Right Way Before you can optimize, you need to make sure your profile is properly set up. Here’s what that actually means: Claim and Verify Your Business If you haven’t claimed your profile yet, head to business.google.com and search for your business. If it already exists, click “Own this business?” and follow the verification steps. Google typically sends a postcard with a verification code to your physical address, though some businesses qualify for instant or email verification. One critical point: if you have multiple locations, each one needs its own separate profile. Don’t try to combine them or use a single listing to cover multiple areas. Get Your Business Name Right This is where many businesses sabotage themselves from day one. Your profile name must match your real-world business name exactly. Resist the urge to stuff keywords into your name like “Joe’s Plumbing – Emergency Plumber Serving Denver.” Google’s guidelines are strict here, and violations can lead to suspension. Use your actual registered business name and nothing more. You’ll have plenty of other places to use keywords strategically. Choose Your Categories Wisely Your primary category is one of the biggest ranking factors in local search. Choose the category that most accurately describes your core business. A restaurant owner who also offers catering should choose “Restaurant” as primary, not “Caterer.” But don’t stop there. Google allows up to nine additional categories. A landscaping company might add “Lawn Care Service,” “Garden Designer,” and “Landscape Lighting Designer” as secondary categories to expand their visibility across different searches. As of late 2025, Google has approximately 4,000 categories to choose from. Take time to explore options that align with your most profitable services and highest search volume keywords. The Essential Elements of an Optimized Profile Once your basic setup is complete, it’s time to optimize every section of your profile. Here’s what actually moves the needle: Before you can optimize, you need to make sure your profile is properly set up. Here’s what that actually means: NAP Consistency: The Foundation of Trust NAP stands for Name, Address, and Phone number. These three pieces of information must be identical everywhere they appear online: your website, your Business Profile, social media, online directories, everywhere. Even small inconsistencies like “Street” versus “St.” or different phone number formats can confuse Google’s systems and hurt your rankings. This consistency signals to Google that your business information is trustworthy and verifiable. Write a Compelling Business Description You have 750 characters to describe what you do, who you serve, and where you’re located. This isn’t a direct ranking factor, but it massively impacts click-through rates and customer decisions. Good example: “UrbanSpark HVAC provides reliable heating and cooling services across the Minneapolis-St. Paul area. Founded by certified technician Mark Thompson, our team handles furnace repairs, AC installations, ductwork cleaning, thermostat upgrades, and full HVAC system maintenance.” Notice how this description includes location, services, and credibility signals without sounding like keyword spam. Write for humans first, but naturally include the terms your customers actually search for. Add Your Services in Detail The Services section is one of the most underutilized features in Google Business Profile. This is where you can list specific offerings with keyword-rich names and descriptions. Instead of just listing “Plumbing Services,” break it down: “Emergency Leak Repairs,” “Water Heater Installation,” “Sewer Line Inspections,” “Drain Cleaning.” Each service you list creates another opportunity to match specific customer searches. Get Your Hours Right (And Strategic) Accurate hours are non-negotiable. Showing incorrect hours leads to frustrated customers and negative reviews. But here’s something most businesses don’t know: your hours can be a competitive advantage. If your competitors close at 5 PM and you can stay open until 7 PM, your profile will show as “OPEN” during those crucial evening hours when theirs say “CLOSED.” This simple difference can dramatically increase your calls and direction requests. Update your hours for holidays and special events immediately. Nothing damages trust faster than a customer showing up to a closed business that Google said was open. The Power of Visual Content High-quality photos and videos are no longer optional. In 2026, Google’s AI interprets visual content more intelligently than ever, and images directly influence your local search rankings. Businesses with professional photos get significantly
15 Common and Uncommon Keyword Research Mistakes to Avoid

15 Common and Uncommon Keyword Research Mistakes to Avoid Keyword research is the backbone of any successful SEO strategy. However, many website owners make mistakes that prevent their websites from ranking well and attracting organic traffic. Some of these mistakes are common, but others are slightly more uncommon. Regardless, they’re still equally harmful. In this guide, we’ll explore these critical keyword research mistakes and how to avoid them, ensuring that your SEO efforts yield the best possible results. Common Keyword Research Mistakes 1. Ignoring Search Intent Many website owners focus solely on keyword volume without considering the search intent behind the keyword. The result of this could mean that you end up targeting the wrong audience. In your research, analyze keywords by looking at whether they’re informational, transactional, or navigational. To do this, use Google’s search results for the keyword you are targeting to see what type of content ranks and align your content accordingly. 2. Targeting Only High-Volume Keywords Chasing high-volume keywords might seem like a great idea, however, these types of keywords are oftentimes highly competitive which makes them more difficult to rank for. A solution is to use a mixture of high, medium, and low-volume keywords, along with long-tail keywords which are easier to rank for and have far better conversion rates. 3. Ignoring Long-Tail Keywords Many website owners neglect the use of long-tail keywords in favour of shorter, broad-term keywords with the idea that these keywords will result in better results. However, using long-tail keywords usually possesses lower competition and higher intent. To find valuable long-tail keywords, use tools like Google’s autocomplete, Answer the Public and other keyword research tools. 4. Not Using Keyword Variations Many website owners focus on using only one version of a keyword rather than using synonyms and variations of said keyword. A potential solution for this would be to use LSI or Latent Semantic Indexing keywords and keyword variations to create comprehensive content that has the potential to rank for multiple terms. 5. Relying Solely on Keyword Research Tools Another mistake is that many website owners depend solely on the details given by a keyword research tool without validating their findings. Now, while tools like Ahrefs, SEMrush, and Google Keyword Planner are useful, it’s a good idea to ALWAYS verify keywords by analyzing search engine results pages (SERPs) to understand the real-world competition and intent behind each keyword. 6. Overlooking Local Keywords A mistake that website owners can also make is ignoring local keyword variations, especially when their businesses serve customers in their immediate area. It’s a good idea to incorporate local keywords (e.g., “best bakery in London”) into your website and content and to optimize your Google My Business profile to capture local search traffic. 7. Keyword Stuffing Another mistake that gets made is to overuse keywords unnaturally throughout your content. This can hurt your rankings and your user experience as the content will come off as being written for a search engine and not for your audience. Instead, use keywords naturally in your content. Focus on readability and user experience and aim for keyword density (in other words, the number of times a keyword shows up in your content) of around 1-2%. It’s also a good idea to use synonyms throughout your content where possible. 8. Not Updating Keyword Strategy Regularly Many website owners stick with the same keyword strategy for years without ever updating it. What they don’t realize is search trends evolve. Revisiting your keyword strategy using tools like Google Trends and search analytics will help you stay on top of the changing trends. 9. Forgetting About Competitor Analysis Competitor analysis is a vital part of keyword research and not many website owners take the time to analyze the keywords their competitors use and rank for. Through the use of tools like Ahrefs and SEMrush to keep tabs on your competitor’s keywords, you’ll find opportunities for your own content strategy. 10. Not Mapping Keywords to Buyer’s Journey Another keyword research transgression that website owners overlook is using keywords without considering the buyer’s journey. By aligning the keywords with the stages of awareness, consideration, and decision, you can create content that moves users through the funnel. Uncommon Keyword Research Mistakes 11. Ignoring Seasonality in Keywords One of the many uncommon mistakes is not accounting for seasonal trends in keyword popularity. Using Google Trends to identify seasonal keywords can help you plan your content around these seasonal events. 12. Using Broad Match Keywords Incorrectly This relates more to PPC campaigns, but a more uncommon mistake that may occur is the use of broad-match keywords in a Google Ads campaign without understanding how they trigger ads. Instead of using broad-match keywords, rather look at using phrase and exact-match keywords to help improve your ad’s relevance and reduce wasted ad spend in the long run. 13. Not Considering Voice Search Optimization People search for things in a variety of ways and one of the newer ways users search for things online is through voice assistants like Siri and Alexa. Tapping into this is easy enough. By simply optimizing your content for natural language queries and question-based keywords like “How do I fix a leaky faucet?”, you’ll be able to widen your reach online. 14. Not Checking Keyword Cannibalization Keyword cannibalization can have a detrimental effect on your site’s SEO and this occurs when you target the same keyword across multiple pages of your website. This creates a scenario where you are in competition with your own website. To combat this, use a keyword mapping strategy and consolidate similar content to avoid cannibalization altogether. 15. Ignoring Zero-Click Searches Finally, another uncommon mistake is when website owners ignore zero-click searches by not optimizing their content for featured snippets, knowledge panels, and other SERP features. By looking at your rankings through a wider lens, website owners should structure their content with FAQs, tables, and bullet points to increase the chances of having their content appear in these rich results in Google’s SERPs. Conclusion
Understanding Exit Rate vs. Bounce Rate: Which One Should Website Owners Improve?

Understanding Exit Rate vs Bounce Rate: Which One Should Website Owners Improve? When analyzing website performance, two critical metrics often come up: exit rate vs bounce rate. While both provide insights into user behavior, they serve different purposes and impact website optimization strategies in unique ways. Understanding the differences and determining which metric to prioritize can help website owners enhance user experience and improve conversions. What is Exit Rate? Exit rate refers to the percentage of visitors who leave a website from a specific page, regardless of how many pages they visited before exiting. It indicates where users are ending their journey on the site. A high exit rate on certain pages may signal an issue with content, usability, or navigation. How Exit Rate is Calculated: Exit Rate = (Total Exits from a Page / Total Visits to That Page) * 100 A high exit rate on checkout or landing pages may suggest friction points that need addressing, such as unclear CTAs, slow load times, or a lack of relevant content. What is Bounce Rate? Bounce rate measures the percentage of visitors who land on a webpage and leave without interacting further with the site. A “bounce” happens when a user visits only one page and then exits without clicking any links or navigating elsewhere. How Bounce Rate is Calculated: Bounce Rate = (Single-Page Sessions / Total Sessions) * 100 A high bounce rate often indicates that users are not finding what they expected or that the page fails to engage them effectively. Which Metric Should Website Owners Improve? Both metrics are important, but the priority depends on the type of website and business goals: Bounce Rate should be a primary focus for pages meant to engage users, such as landing pages, blogs, or homepages. A high bounce rate here suggests that visitors are not interested in staying longer, which can harm conversion rates. Exit Rate should be improved for crucial conversion pages, such as checkout pages, product pages, or forms. If users frequently exit from these pages, there may be friction preventing them from completing their journey. Reasons to Improve These Metrics Why Reduce Bounce Rate? Improve Engagement: A lower bounce rate means visitors are exploring more pages and spending more time on the site. Increase Conversions: Keeping users engaged can lead to higher sign-ups, sales, or other desired actions. Enhance SEO Performance: Search engines may interpret a high bounce rate as a sign of poor relevance, affecting rankings. Why Reduce Exit Rate? Optimize the User Journey: Understanding where users drop off helps identify and fix pain points. Improve Conversions: Reducing exits on key pages ensures more users complete desired actions, such as making a purchase or filling out a form. Enhance User Experience: Pages with high exit rates may need better content, clearer navigation, or improved load speed. Conclusion While both exit rate vs bounce rate provide valuable insights, website owners should focus on reducing bounce rates for engagement-driven pages and exit rates for conversion-driven pages. By analyzing these metrics and making necessary optimizations, businesses can improve user experience, boost engagement, and drive higher conversions.